
Trigona bee cultivation has some advantages over Apis bees because Trigona bees can be kept in one fixed place due to their smaller body size, which ranges from 3-8 mm. This allows them to collect pollen and honey from all kinds of flowers by entering into the petals.
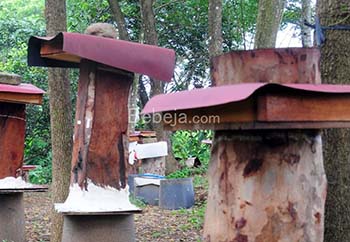
In the past, traditional beekeepers used gelodok made from soft woody tree trunks such as coconut trunks, randu trunks, and pucung trunks to create hives. The gelodok is designed to imitate bee houses found in tree trunks or caves.
It consists of a halved trunk, 80-100 cm in length, with a portion reserved for the bees to nest. The container is sealed with a coconut shell that has a hole in the center. The gelodok is then hung on a tree branch where the bees can fly to it.
In 1851, Dr L Langstroth from the United States pioneered modern beehive manufacturing by creating an artificial hive from a wooden box with a hive frame inside. This allowed the hive to be lifted and moved and is now known as the L-type hive. Langstroth’s invention also inspired breeders to innovate in making trigona bee hive models.
Trigona beekeepers can use simple hive materials that can be sealed, avoiding the need for expensive or luxurious hives.
A. Bamboo
To create bamboo bee houses, split bamboo stems of 1-3 segments into 2 equal parts and smooth the former split with a sharp knife. Insert the next piece and cover it with the other half. Make exit holes according to the type of bees.
Advantages: This method is relatively inexpensive, as it only requires 1-3 bamboo segments and rope for hanging, and is easy to construct.
Disadvantages: Harvesting can be challenging due to the propolis that glues the bamboo halves together. Additionally, the limited space in the hive can quickly become full. Late harvesting may also result in the bees leaving.
B. Horizontal Wooden Box
How to make a wooden nest for trigona bees: None mentioned. Use scrap wood, such as sengon wood, to create a rectangular box measuring 30 cm x 15 cm x 15 cm, complete with a lid. Arrange several pieces of boards of the same size to form the box. Before permanently closing the box, insert the trigona beehive pieces.
C. Plastic Pot
To create this setup, install two barrel-shaped plastic plant pots facing each other. Insert a trigona bee nest into one of the pots to attract the trigona to stay. Finally, glue the two pots together using an appropriate adhesive. To provide a point of entry for the bees, it is recommended to create a hole at the bottom of the pot. On the other hand, dropping the nest may also result in breakage.
This method offers several advantages, including ease of acquisition and construction, as well as simple harvesting. However, it is important to note that the pot may break if the glue is difficult to open.
D. Nest of Shell
To create a nesting site for trigona bees, a 1 cm diameter hole should be cut into the shell to allow for entry and exit. The shell should then be placed over the desired area of the nest in the tree. After approximately 4 months, the shell will become integrated into the main hive. If desired, the shell can be relocated to the farmer’s house or yard.
Trigona bee colonies in shells can be used to form new colonies in other shells. Based on experience, two shells containing Trigona bee colonies can produce ten new colonies in about four months. One advantage of this method is that the materials are easy to find. However, there are also some disadvantages. Trigona bees must work diligently to seal all gaps in the shell, as it cannot be tightly arranged.
E. Vertical Wooden Box
The process of making a vertical wooden box hive is similar to that of a regular wooden box hive, with the main difference being the placement. The walls of the hive are tightly glued together, resulting in a non-translucent appearance. Farmers in North Luwu first used vertical wooden box hives because they imitated the beehives found in vertical tree holes in the forest. The hive cover is constructed in pairs with the box, making it easy to open and close without requiring the bees to glue the gap tightly.
This results in a cleaner product and easier harvesting due to less adhesive on the cover. However, hive building may be slightly more challenging. Farmers may encounter difficulty accessing propolis as it is often located at the bottom of the box.
 F. 3-Door Horizontal Wooden Box
This nest box is designed for producing seedlings. It has a similar construction to the horizontal wooden box type, with the main door and entrance hole located in the center. The central room is intended for seedling production. That is why the nest box is designed to be portable or detachable. By lifting the cover of the box, the nest will be lifted as well. The box containing the nest can be moved to a new location.
Advantages: It is easier to build and disassemble.
Disadvantages: Care should be taken when opening nests that are covered by permanent boards.
G. 3-Tier Vertical Wooden Box
This model is a refined version of the vertical wooden box nest type. It consists of three boxes of different sizes arranged vertically, with the largest box at the bottom. The trigona entry hole is located in the bottom box, while the top box serves as a cover.
The lid allows the farmer to monitor the hive’s condition. The key is to elevate the desired section for practicality. Likewise, when harvesting, the farmer can extract the nest through the cover hole. Despite consisting of three boxes, the model maintains the same height as the standard vertical model, which is 50 cm.
Benefits: Harvesting propolis is made easy as it is located in the bottom box, while the top two boxes can be easily lifted. However, it is important to note that this method may result in higher production costs, ranging from IDR75,000 to IDR100,000 per hive.